ComfyUI_Noise
ComfyUI Noise provides 6 nodes for ComfyUI, offering more control and flexibility over noise. It includes nodes for generating noise, duplicating batch samples, mixing latents, calculating noise strength, injecting noise, and reversing sampling. For example, it can generate variations of an image by slerping different noises, and find the noise for a given image using the unsampler. It also comes with example workflows to demonstrate usage.
BlenderNeko
Description
ComfyUI Noise
This custom node includes 6 nodes for ComfyUI, which offer greater control and flexibility over noise. This enables workflows with minor variations in generations or helps find the corresponding noise for an input image and prompt.
Nodes
Noisy Latent Image:
This node allows you to generate noise. You can locate this node under latent>noise, and it has the following settings:
- source: Specifies where to generate the noise. Currently, it supports GPU and CPU.
- seed: The seed for the noise.
- width: The width of the image.
- height: The height of the image.
- batch_size: The size of the batch.
Duplicate Batch Index:
The functionality of this node has been moved to the core. Please use Latent>Batch>Repeat Latent Batch and Latent>Batch>Latent From Batch instead.
This node enables you to duplicate a specific sample in the batch. It can be used to duplicate, for example, encoded images or the noise generated by the node mentioned above. You can find this node under latent, and it has the following settings:
- latents: The latent data.
- batch_index: The index of the sample in the latents to duplicate.
- batch_size: The new batch size, indicating how many times to duplicate the sample.
Slerp Latents:
This node allows you to mix two sets of latents. Both input latents must have the same dimensions; otherwise, the node will ignore the mix factor and output the top slot instead. Regarding other elements attached to the latents, such as masks, only those from the top slot are passed on. You can find this node under latent, and it has the following inputs:
- latents1: The first batch of latents.
- latents2: The second batch of latents. This input is optional.
- mask: Determines where in the latents to perform the slerp operation. This input is optional.
- factor: Specifies the proportion of the second batch of latents to be slerped into the first.
Get Sigma:
This node can be used to calculate the amount of noise a sampler expects at the start of the denoising process. You can find this node under latent>noise, and it has the following inputs and settings:
- model: The model for which to calculate the sigma.
- sampler_name: The name of the sampler for which to calculate the sigma.
- scheduler: The type of schedule used in the sampler.
- steps: The total number of steps in the schedule.
- start_at_step: The starting step of the sampler, indicating the expected amount of noise in the input image.
- end_at_step: The current ending step of the previous sampler, indicating the existing amount of noise in the image.
Most of the time, you would simply keep start_at_step at zero and end_at_step at steps. However, if you want to re - inject some noise between two samplers, for example, one sampler denoising from 0 to 15 and a second from 10 to 20, you would set start_at_step to 10 and end_at_step to 15. This way, the image at step 15 can be noised back to step 10 so that the second sampler can bring it to step 20. Note that the Advanced Ksampler has settings for add_noise and return_with_leftover_noise, which should both be disabled when working with these nodes.
Inject Noise:
This node allows you to inject noise into an image latent. You can find this node under latent>noise, and it has the following inputs:
- latents: The latents into which the noise will be injected.
- noise: The noise. This input is optional.
- mask: Determines where to inject the noise. This input is optional.
- strength: The strength of the noise. Note that you can use the above - mentioned node to calculate an appropriate strength value.
Unsampler:
This node performs the reverse operation of a sampler. It calculates the noise that would generate the image based on the model and the prompt. You can find this node under sampling, and it takes the following inputs and settings:
- model: The target model.
- steps: The number of steps for noising.
- end_step: The step to which to travel back.
- cfg: The classifier free guidance scale.
- sampler_name: The name of the sampling technique to use.
- scheduler: The type of schedule to use.
- normalize: Whether to normalize the noise before output. This is useful when passing it to an Inject Noise node, which expects normalized noise.
- positive: The positive prompt.
- negative: The negative prompt.
- latent_image: The image to be renoised.
When trying to reconstruct the target image as accurately as possible, it works best if both the unsampler and sampler use a cfg scale close to 1.0 and a similar number of steps. However, it is interesting and worthwhile to experiment with these settings to gain a better understanding of the results. This node can achieve similar effects as the A1111 img2img alternative script.
Examples
Here are some examples demonstrating how to use the above nodes. The workflows for these examples can be found in the example_workflow folder.
generating variations
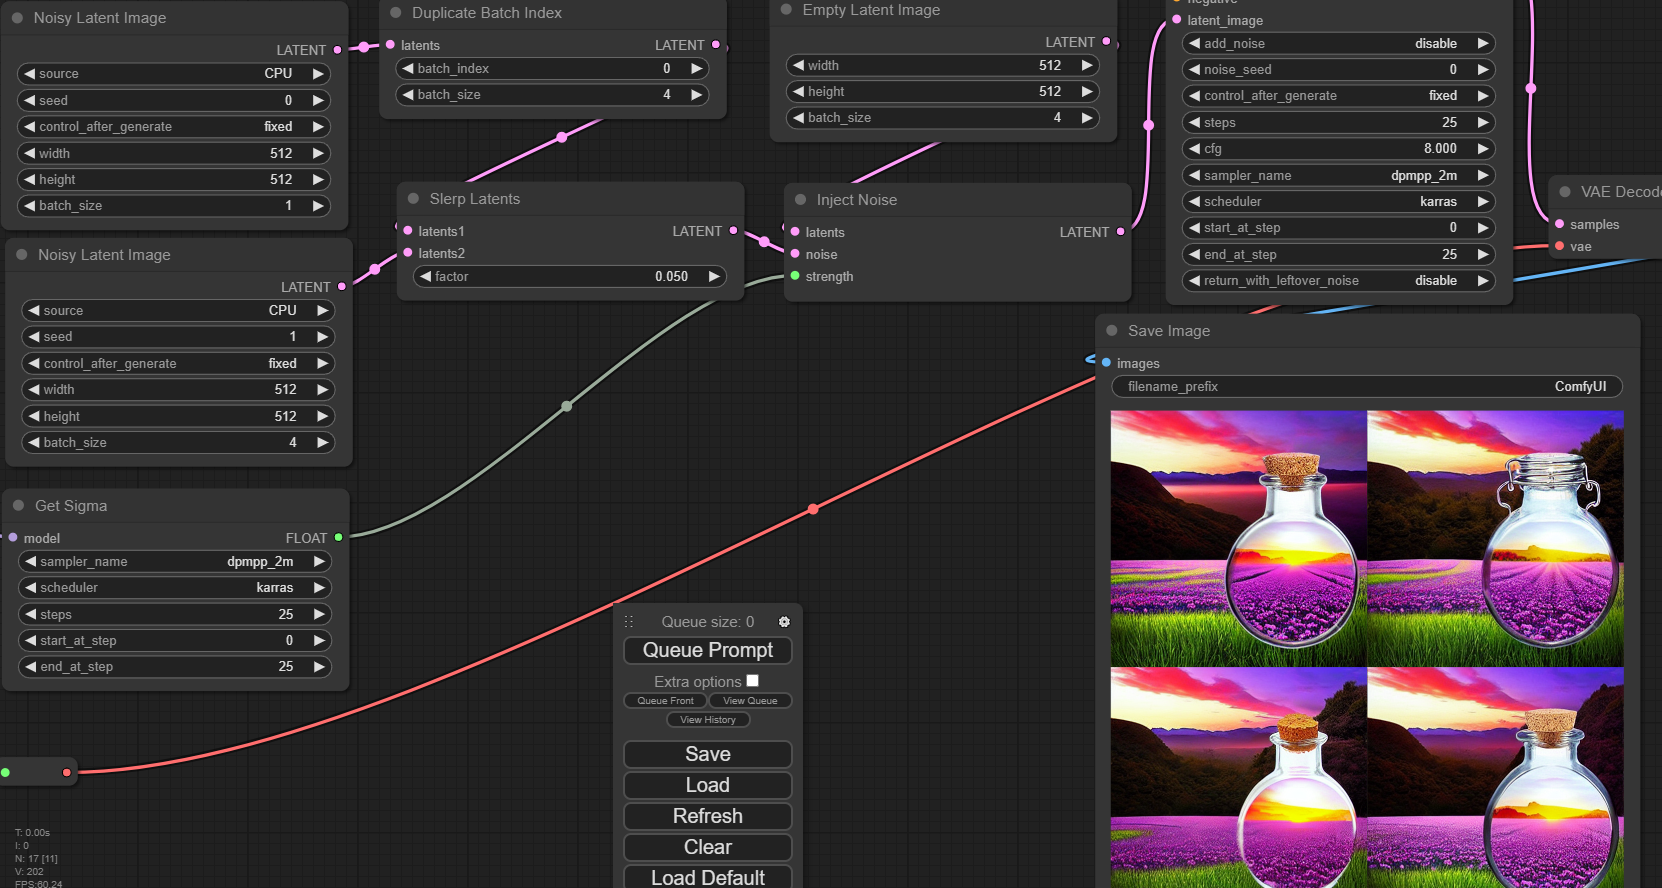
To create minor variations in a given generation, you can follow these steps: First, generate the noise for the seed you are interested in using a Noisy Latent Image node. Then, create an entire batch of these using a Duplicate Batch Index node. Note that if you are doing this for img2img, you can use the same node to duplicate the image latents. Next, generate more noise, but this time create a batch of noise instead of a single sample. Then, use a Slerp Latents node to slerp this newly created noise into the other one. To determine the required strength for injecting this noise, use a Get Sigma node. Finally, use an Inject Noise node to inject the slerped noise into a batch of empty latents. Note that you should use an advanced Ksampler with the add_noise setting disabled.
"unsampling"
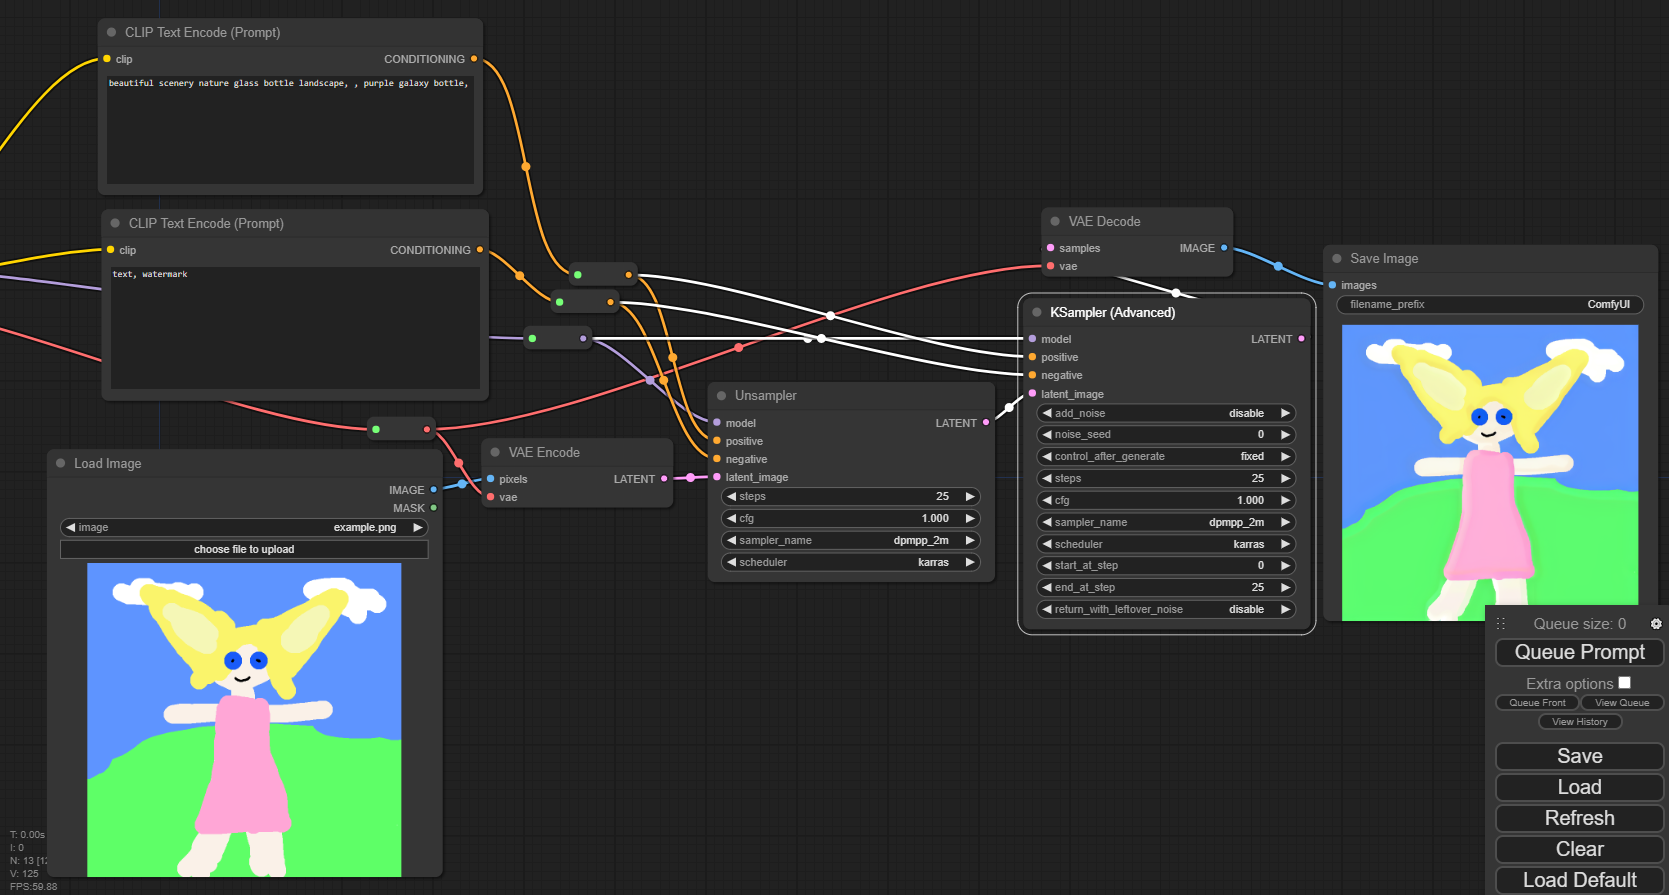
To obtain the noise that recreates a specific image, first load the image. Then, use the Unsampler node with a low cfg value. To verify if this is working, take the resulting noise and feed it back into an advanced ksampler with the add_noise setting disabled and a cfg of 1.0.